
Freqtrade.io is one of the free open source Crypto trading bots. It supports the following exchanges:
- Bittrex
- Binance
- Kraken
The features which make freqtrade stand out against other trading bots are
- Python 3.6 – Python based making it OS independent , run it on Windows, macOS and Linux.
- Dry-run – Run trial runs (trading) without staking any money to perfect your bot
- Backtesting – Run your Buy / Sell Strategy in simulated mode
- Machine Learning Strategy Optimization – Use in built machine learning algorithms to optimize your Buy / Sell Strategy
- Whitelist Crypto’s – Trade only the crypto currencies you want
- Blacklist Crypto’s – List crypto’s you don’t want to trade in
- Telegram – Interact with your bot by sending Start , Stop, Performance, Balance commands from Telegram
- Get Profit / Loss in Fiat – Supports Profit / Loss display in 33 fiat currencies
- Get Daily Summary – Get daily summary of Profit / Loss
If you can get Docker installed on your system then installing & running is a breeze. All you need is the following configuration for Docker Installation:
- Windows 10 64-bit – Home, Pro, Enterprise, or Education
- 4GB system RAM
- 64 bit processor with Second Level Address Translation (SLAT)
- virtualization support – Enabled in BIOS Hardware level
Windows Home:
Installing Docker:
- Version 2004 or higher - Update your Windows to be Version 2004 or Build 19041 or higher
- Press Windows logo key + R, type winver, select OK
- In the pop up Check your Windows version
- If its lower than 2004 then goto SettingsàWindows Update à Update to Version 2004
- This will take a couple of hrs depending on your internet speed as it’s a major update
Enable Virtual Machine Platform
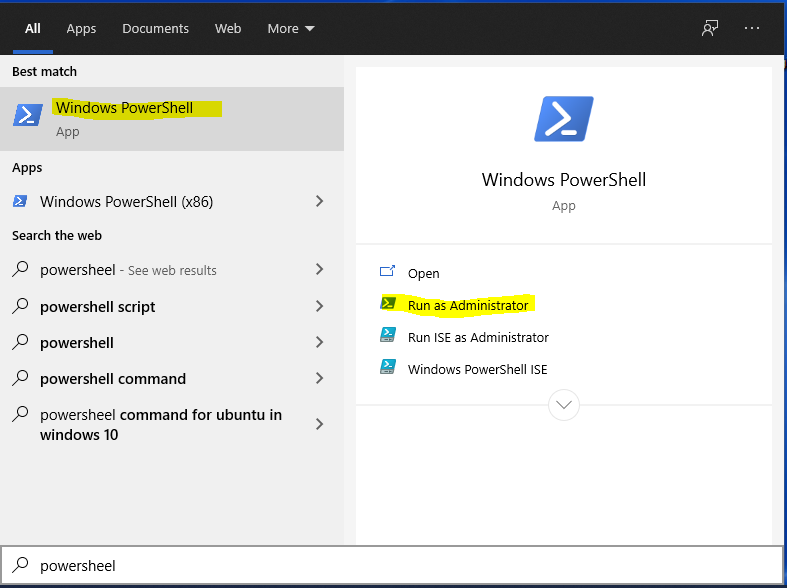
· Press Windows logo key + S, type Powershell, Run as Administrator
· Execute in Powershell:
dism.exe /online /enable-feature /featurename:VirtualMachinePlatform /all /norestart
· Restart Machine
Enable WSL2:
Once you Machine restarts after enabling Virtual Machine Platform you need to set WSL 2 as default version
Execute :
wsl --set-default-version 2
You might see the message:
WSL 2 requires an update to its kernel component. For information please visit https://aka.ms/wsl2kernel.
Please goto https://aka.ms/wsl2kernel. & follow instructions to install Linux kernel for WSL 2
Install Linux Distribution:
Once WSL 2 is installed & enabled you will need to install Linux distribution from Microsoft Store
- Click on https://aka.ms/wslstore or Press Windows logo key + S, type store & select Microsoft Store
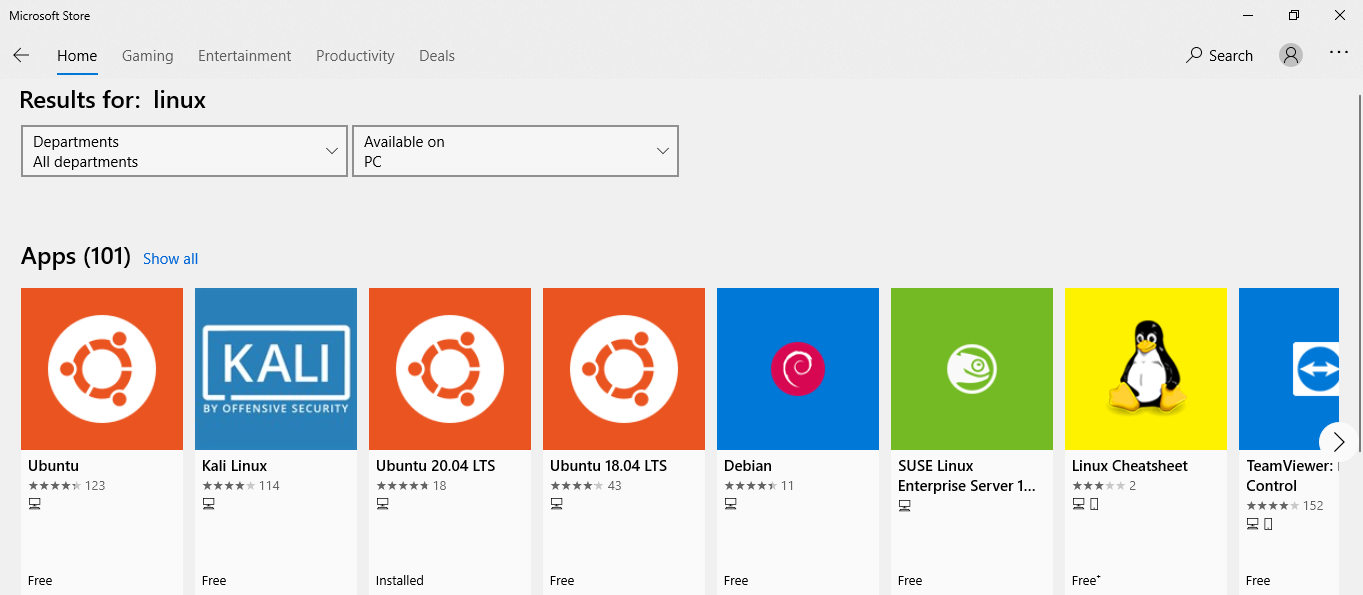
- Once in Microsoft Store search Linux
Install one of the Linux distribution:
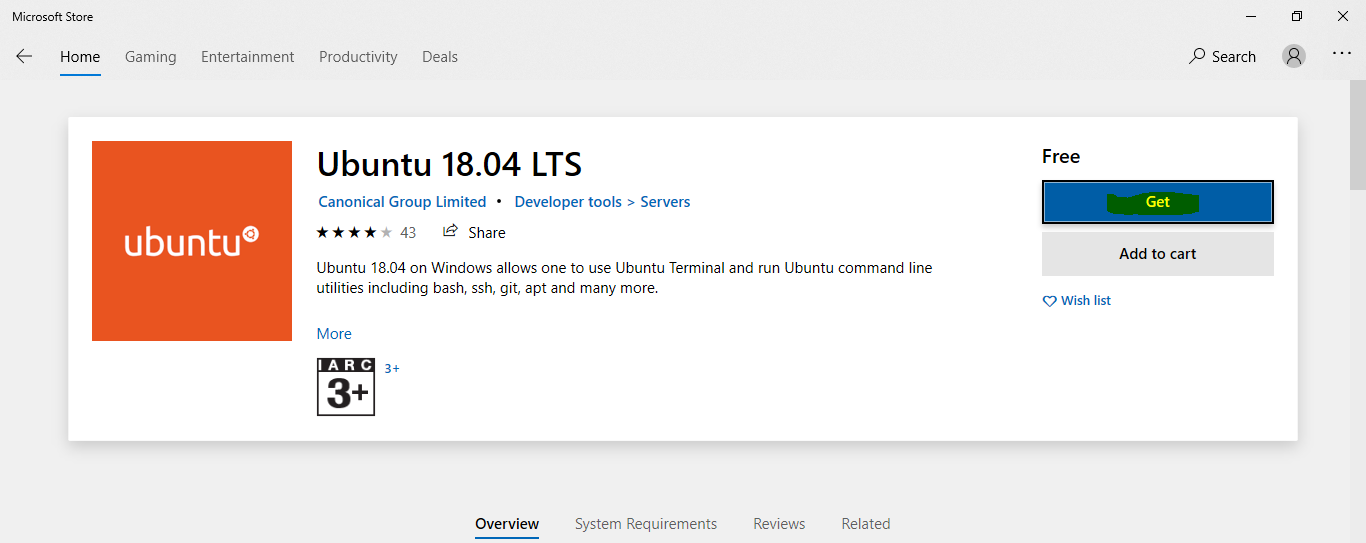
Click on Get
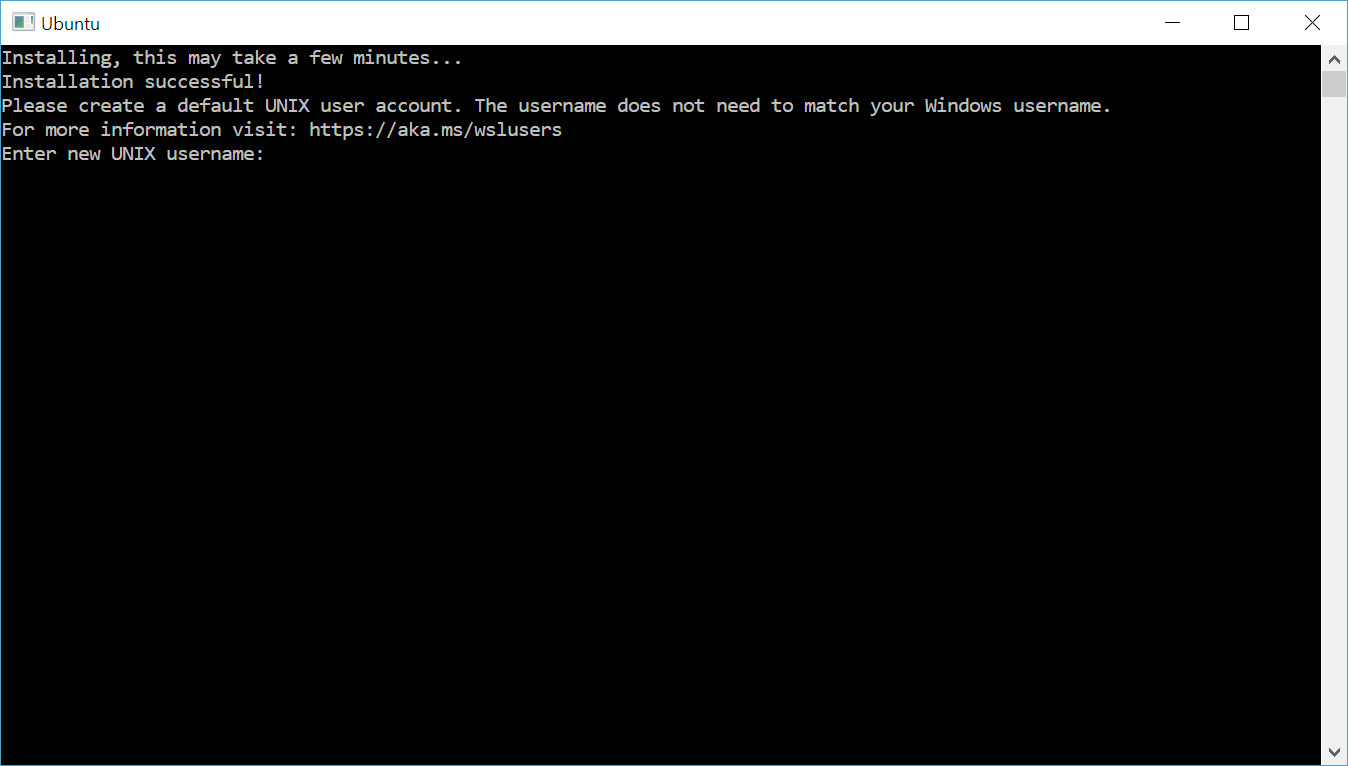
First time you launch linux you will have set a User Name & Password:
Check WSL version assigned to your Installed Linux with command:
wsl --list –verbose

It should have Version 2 against its name else execute the below command to set it to Version 2
wsl --set-version <distribution name> <versionNumber>
In the above case this will be
wsl --set-version Ubuntu-20.04 2
If you have trouble installing Linux or WSL please refer to this resource: https://docs.microsoft.com/en-us/windows/wsl/install-win10
You should be all set now to install Docker!
Docker Install:
- Goto https://hub.docker.com/editions/community/docker-ce-desktop-windows/
- Download Stable
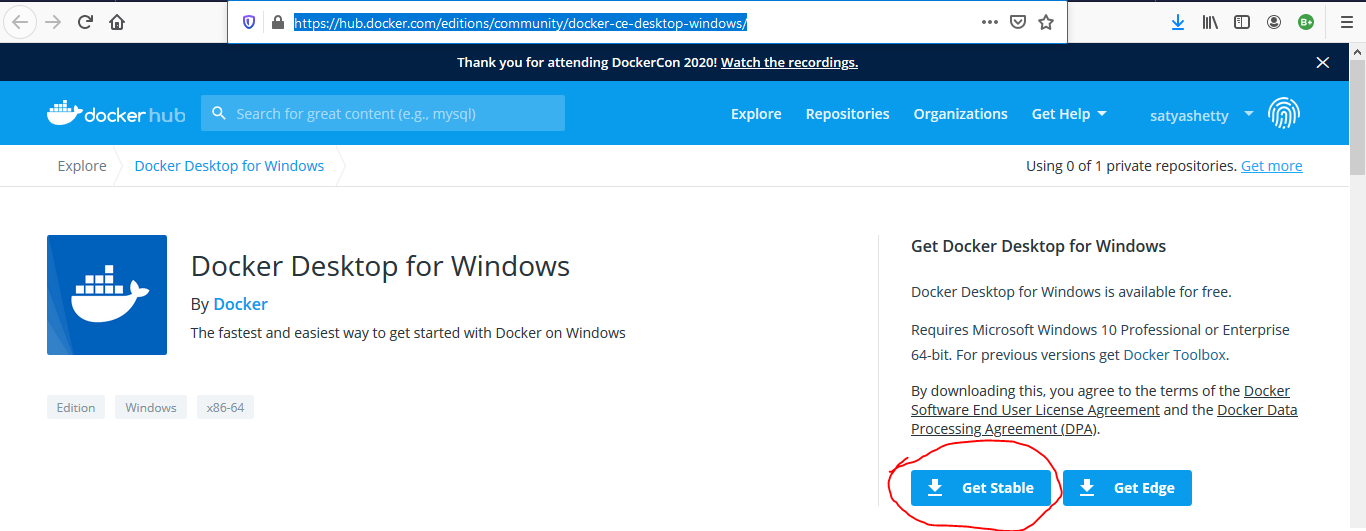
- Double Click on Docker Desktop Installer.exe to install Docker
- Ensure that Enable WSL 2 Features option is selected on the Configuration page.
- Finish the tutorial of Docker
- Install git from the link provided in Docker tutorial (as you will need this later)
Install Freqtrade:
- Make Sure Docker is Up & Running
- Execute Windows logo key + R, type cmd
- Navigate to directory where you want freqtrade installed or create new directory by following below steps
mkdir ft_userdata
cd ft_userdata/
# Download the docker-compose file from the repository
curl https://raw.githubusercontent.com/freqtrade/freqtrade/develop/docker-compose.yml -o docker-compose.yml
# Pull the freqtrade image
docker-compose pull
# Create user directory structure
docker-compose run --rm freqtrade create-userdir --userdir user_data
# Create configuration - Requires answering interactive questions
docker-compose run --rm freqtrade new-config --config user_data/config.json
That’s it you are good to Go!
For more detailed install instructions please visit : https://www.freqtrade.io/en/latest/docker/
Telegram Installation:
If you want to control your bot through Telegram then you will need to install it
Install Telegram by following instructions from this link: https://www.freqtrade.io/en/latest/telegram-usage/
Open config.json from directory ft_userdata\user_data\
Update the following:
“enabled”: true,
“token”: <enter token received while configuring telegram>
“chat_id”: <enter chat id received while configuring telegram>
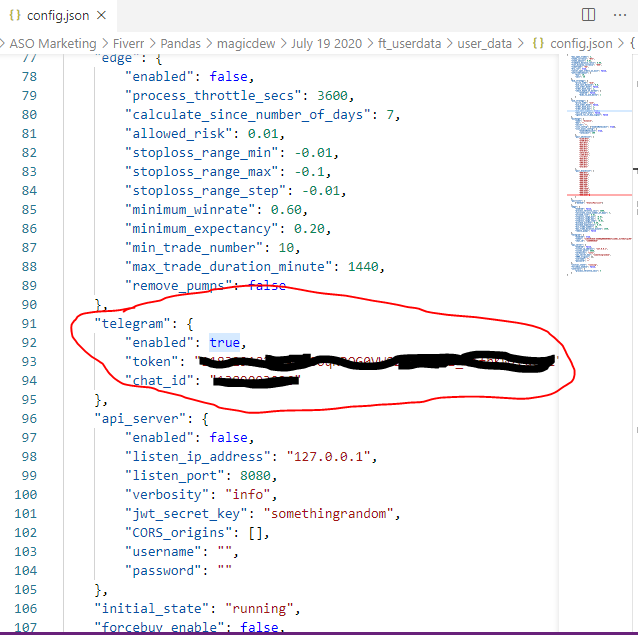
You will need to have your bot in running status for your to be able to run it via Telegram
Once you have configured telegram do the following
Execute
docker-compose run --rm freqtrade trade --config user_data/config.json --strategy SampleStrategy

Launch Telegram

& select your Bot mine is named @satya_own_freqtrade_bot
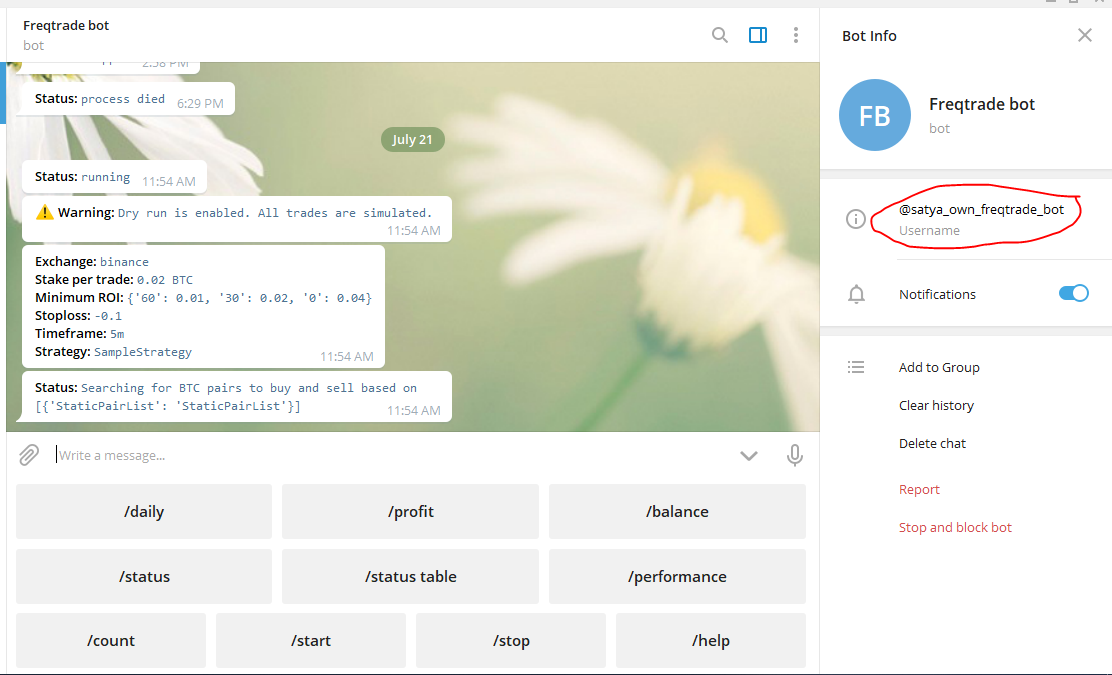
Yay! Now you can

Start / Stop & control your Bot through Telegram remotely !!